Creating synchronization sensitive components
One issue that’s always a struggle with building reusable components is managing asynchronous operations. The problem is that depending on the type of application that is going to use the component, the thread used for callbacks and events may or may not be important. For example, with Console based applications, callbacks on different threads might be ok - at least as long as the application itself ensures thread safety. But, with a Windows Forms application, threading is critical - you are not allowed to touch UI controls from any thread other than the main one and so we end up with the Control.BeginInvoke logic in each of our callbacks which sucks.
Enter the Synchronization Context - a new feature of .NET 2.0. Here’s how it works:
You derive your component from System.ComponentModel.Component.Component and provide your typical asynchronous function – in this example, we will build a PiCalculator:
public class PiCalculator : Component
{
    public PiCalculator();
    public object CalculatePi(int digits, object stateData);
    public void CancelAsync(object asyncTask);
}
Here, what we’ve done is create a new component with a default constructor and a method called CalculatePi which takes the number of digits, an optional piece of state data and returns an object. With this component, I’d like to have multiple outstanding asynchronous operations and so I need some way to track each one to identify it when it completes, and also to cancel it if it runs too long.
Microsoft’s general pattern for this is to use the stateData parameter and have the application pass in some unique value to identify the request. This is an ok way to do it, but it puts several restrictions on our implementation:
- The state data must be supplied.
- The state data must be unique for each operation.
In addition, there’s the possibility of a race condition if I re-use the state data after canceling an operation. So, to avoid all of these issues, I have the component return the task identifier as part of the request - this is the object return value coming back from CalculatePi. I can then use that object to identify the results, and I can pass it into the component’s CancelAsync method to cancel a pending request.
So, how do I get my results? Through a delegate callback of course! I need to create a delegate signature that uses it. The general EventHandler callback signature is: void Method(object sender, EventArgs e) so, we’ll use a derivative of this as our delegate:
public delegate void PiCalculationCompletedEventHandler(object sender, PiCalculationEventArgs e);
Then we’ll create the class which will be used to report the results. The class is pretty simple - just a data holder really:
public class PiCalculationEventArgs : EventArgs
{
    private int _digits;
    private string _value;
    private bool _canceled;
    private object _stateData;
    private object _taskId;

    public object TaskId { get { return _taskId; } }
    public object State { get { return _stateData; } }
    public bool Canceled { get { return _canceled; } }
    public int Digits { get { return _digits; } }
    public string Result { get { return _value; } }

    internal PiCalculationEventArgs(object taskId, int digits, string value, object stateData, bool canceled)
    {
        _digits = digits;
        _value = value;
        _canceled = canceled;
        _stateData = stateData;
        _taskId = taskId;
    }
}
Now we can implement out component. First, we’ll add a Completed event:
public event PiCalculationCompletedEventHandler CalculationComplete;
This will be used by the application to hook into the results of our component’s calculation. The next part is the key to all of this - AsyncOperation. The AsyncOperation class is new to 2.0 and provides the facility to perform callbacks on the appropriate thread. Essentially, it acts as a callback mediator - detecting the type of thread it was created on and then providing the appropriate marshaling code for it’s internal delegate. You utilize the callback through a new delegate type – SendOrPostCallback. We tie our callback to this delegate type and it will marshal us to the correct threading model. We can then execute our own internal CalculationComplete event. Here’s the basic skeleton: First, we will create an internal contained class which will be used to track the request. This will actually be the object type we return from the CalculatePi method:
class AsyncStateData
{
    public AsyncOperation asyncOperation;
    public volatile bool canceled = false;
    public volatile bool running = true;

    public AsyncStateData(object stateData)
    {
        asyncOperation = AsyncOperationManager.CreateOperation(stateData);
    }
}
Notice the call to AsyncOperationManager.CreateOperation? This is where we create our AsyncOperation class and this factory creator is the context detector. We will have an AsyncOperation for each event we intend to fire back into the client - in our case one for each Pi calculation. But, I could also create a single instance for the client as well - this is actually what is done in the ITapi3 component to allow it to be integrated onto a Windows Form even though events are being received on a background thread. The Tapi events are always fired on the appropriate thread - the background one for non-WinForms apps and the UI thread for WinForms apps.
Next, we will create our internal callback - this is the callback that will actually be fired internally and then call the real application event, so we’ll hook that up with an anonymous delegate in the constructor of our component:
private SendOrPostCallback completionMethodDelegate;

public PiCalculator()
{
    completionMethodDelegate = delegate(object evt)
    {
        // Called on the synchronization thread.
        if (CalculationComplete != null)
            CalculationComplete(this, (PiCalculationEventArgs)evt);
    };
}
Now, let’s implement our CalculatePi method - it’s pretty simple, we’ll use an async delegate to our internal calculator, invoke it and return the AsyncStateData structure we create to identify each task submitted to the component. Then the calculation will be performed on a thread pool thread and we’ll callback to the client when it is finished.
public object CalculatePi(int digits, object stateData)
{
    PiDelegate piDel = InternalCalculatePi;
    AsyncStateData asyncData = new AsyncStateData(stateData);
    piDel.BeginInvoke(digits, asyncData, delegate(IAsyncResult ar) { piDel.EndInvoke(ar); }, null);
    return asyncData;
}
CancelAsync is pretty simple too – it will simply set the Canceled flag of the request:
public void CancelAsync(object asyncTask)
{
    AsyncStateData asyncData = asyncTask asAsyncStateData;
    if (asyncData != null && asyncData.running == true)
        asyncData.canceled = true;
}
Now, we need to implement our PiCalculator. We’re going to cheese out here and just “pretend” to calculate Pi since that wasn’t really the point of this component. We’ll define a delegate to use for the async execution and then implement our function:
private delegate void PiDelegate(int digits, AsyncStateData asyncData);

private void InternalCalculatePi(int digits, AsyncStateData asyncData)
{
    // This would be a real calculator here..
    string PI_DIGITS = "3.141592637309238932482438234724782347234";
    if (digits > PI_DIGITS.Length - 2)
        digits = PI_DIGITS.Length - 2;

    int completedDigits = 0;
    for (; !asyncData.canceled && completedDigits < digits; completedDigits++)
    {
        Thread.Sleep(1000);
    }

    asyncData.running = false;
    string data = PI_DIGITS.Substring(0, completedDigits + 2);
    asyncData.asyncOperation.PostOperationCompleted(completionMethodDelegate,
        new PiCalculationEventArgs(asyncData, digits, data, asyncData.asyncOperation.UserSuppliedState, asyncData.canceled));
}
The key to the callback is the invocation of the PostOperationCompleted method from the AsyncOperation instance we created. It is what calls our handler which will in turn call the client. Once PostOperationCompleted is called, no further work may be done with the AsyncOperation. So, it’s not appropriate for progress reporting - instead you can use PostOperateration for that which allows for multiple calls.
Now, when using this component, we can simply call it as expected:
static void Main(string[] args)
{
    ArrayList taskIds = newArrayList();
    PiCalculator piCalc = newPiCalculator();
    piCalc.CalculationComplete += delegate(object sender, PiCalculationEventArgs e)
    {
        Console.WriteLine("[{0}] {1} = {2}, Canceled = {3}",
            Thread.CurrentThread.ManagedThreadId, e.Digits, e.Result, e.Canceled);
    };

    foreach (string s in args)
    {
        taskIds.Add(piCalc.CalculatePi(Convert.ToInt32(s), s));
    }

    Console.WriteLine("Waiting for results .. press ENTER to cancel."); Console.ReadLine();
    foreach (object task in taskIds)
    {
        piCalc.CancelAsync(task);
    }

    Console.WriteLine("Press ENTER to terminate");
    Console.ReadLine();
}
Here’s the output:
Waiting for results .. press ENTER to cancel.
[3] 10 = 3.1415926373, Canceled = False
[4] 11 = 3.14159263730, Canceled = False
[5] 14 = 3.14159263730923, Canceled = False
[5] 15 = 3.141592637309238, Canceled = False
[5] 17 = 3.14159263730923893, Canceled = False

Press ENTER to terminate
[5] 20 = 3.1415926373092389324, Canceled = True
Not very exciting right? Notice the thread id in the [brackets] is different for some of the callbacks. This indicates we are getting called back on different threads - certainly not the main thread which is waiting for console input. The cool part of this component is that I can use it exactly the same way in a Windows Forms application! So, I don’t have to know that the callback is on a different thread! I don’t have to worry about doing a BeginInvoke or Invoke to get back to the UI thread. So, here’s an example WinForm application:
public partial class CalcPiTestForm : Form
{
    ArrayList _pendingTasks = new ArrayList();

    public CalcPiTestForm()
    {
        InitializeComponent();
    }

    private void CalcPiTestForm_Load(object sender, EventArgs e)
    {
        piCalculator1.CalculationComplete += new UserMath.PiCalculationCompletedEventHandler(piCalculator1_CalculationComplete);
    }

    void piCalculator1_CalculationComplete(object sender, UserMath.PiCalculationEventArgs e)
    {
        lock(_pendingTasks)
        {
            _pendingTasks.Remove(e.TaskId);
        }

        // No need to do BeginInvoke here!!
        listBox1.Items.Add(string.Format("[{0}] {1} = {2}, Canceled = {3}",
            System.Threading.Thread.CurrentThread.ManagedThreadId, e.Digits, e.Result, e.Canceled));
    }

    private void btnCalculate_Click(object sender, EventArgs e)
    {
        if (maskedTextBox1.Text.Length > 0)
        {
            lock(_pendingTasks)
                _pendingTasks.Add(piCalculator1.CalculatePi(Convert.ToInt32(maskedTextBox1.Text)));
        }
    }

    private void btnCancel_Click(object sender, EventArgs e)
    {
        lock(_pendingTasks)
        {
            foreach (object task in _pendingTasks)
                piCalculator1.CancelAsync(task);
        }
    }
}
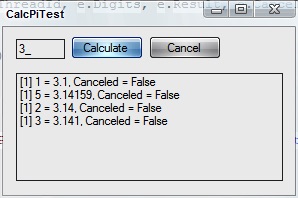
Notice the output here – we haven’t done anything special with the component’s callbacks, but now the callback is always on thread [1]. This is the magic of AsyncOperation and synchronization contexts. Now go out there and write some thread-aware components! If you’d like this entire sample, here is the project