MVVM: Introducing the message visualizers
In this post, I will go over the simple message visualizers available in the MVVM Helpers toolkit. Essentially the idea is that it is fairly common to want to display a simple message from the ViewModel to the user. Since the VM is supposed to be testable, we encapsulate this ability into four services, three of which I’ll focus on here:
| Service | Description |
|---|---|
| IMessageVisualizer | Displays a title + message to the user and allows them to dismiss it through a set of user-defined buttons. The button used to dismiss the dialog is returned as the result. |
| IErrorVisualizer | Displays a title + message to the user to report an error. The only button displayed is OK, and the visualizer returns true/false. |
| INotificationVisualizer | Used to manage some short operation that will halt the UI briefly. |
| IUIVisualizer | Displays a custom modal or modaless UI to the user with an associated ViewModel to drive it. |
To demonstrate the first three visualizer types, we’ll build a very simple MVVM application to display messages. I start with the project template and remove all the ViewModel and View code to have a blank solution. Each of the three visualizers we are going to look at take a string Title and Message as their parameters – we’ll drive it from a unique command for each. To start with, let’s define a simple data structure that wraps an ICommand and a textual title:
/// <summary>
/// Simple command + title text
/// </summary>
public class TitledCommand

{
    /// <summary>
    /// Title to display
    /// </summary>

    public string Title { get; private set; }

    /// <summary>
    /// Command to execute
    /// </summary>

    public ICommand Command { get; private set; }

    /// <summary>
    /// Constructor
    /// </summary>
    /// <param name="title"></param>
    /// <param name="cmd"></param>
    public TitledCommand(string title, ICommand cmd)

    {
        Title = title;

        Command = cmd;
    }
}
Next, in the MainViewModel.cs file, we need a Title string property – this will be the title for each of the visualziations. It’s just a simple field-backed INPC property, we’ll bind it to something in the view:
/// <summary>
/// Main View Model
/// </summary>
public class MainViewModel : ViewModel
{
    private string _title;

    /// <summary>
    /// Title for visualizations
    /// </summary>
    public string Title
    {
        get { return _title; }
        set { _title = value; OnPropertyChanged("Title"); }
    }
}
Now we can create a collection of the TitledCommand objects and display them to the user for execution. We will place this collection into the MainViewModel.cs. Let’s populate it with a set of delegating commands for each type of visualization we want to create. We will use the **DelegatingCommand
/// <summary>
/// Main View Model
/// </summary>
public class MainViewModel : ViewModel
{
    ...
    /// <summary>
    /// Visualization Command list
    /// </summary>
    public IList<TitledCommand> VisualizationCommands { get; private set; }

    /// <summary>
    /// Constructor
    /// </summary>
    public MainViewModel()
    {
        VisualizationCommands = new List<TitledCommand>
        {
            new TitledCommand("Show Message", new DelegatingCommand<string>(OnShowMessage,
                s => !string.IsNullOrEmpty(Title) && !string.IsNullOrEmpty(s))),
            new TitledCommand("Show Error", new DelegatingCommand<string>(OnShowError,
                s => !string.IsNullOrEmpty(Title) && !string.IsNullOrEmpty(s))),
            new TitledCommand("Show Notification",
                new DelegatingCommand<string>(OnShowNotification,
                s => !string.IsNullOrEmpty(Title))),
        };
    }
}
The CanExecute handler for each of them will test the Title property – ensure there is a value there, and the inbound parameter (the Message) and make sure there is a value there as well.
IMessageVisualizer
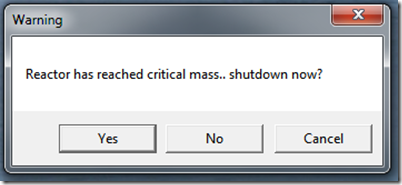
The IMessageVisualizer is used to show a simple message to the user – it takes a title, message and an enumeration to decide which buttons to display. The default implementation of the service displays a MessageBox.

The buttons you can display include:
    public enum MessageButtons
    {
        OK = 0,
        OKCancel = 1,
        YesNoCancel = 3,
        YesNo = 4
    }
The result from the service is which button was used to dismiss the dialog:
    public enum MessageResult
    {
        None = 0,
        OK = 1,
        Cancel = 2,
        Yes = 6,
        No = 7
    }
Using the visualizer is very easy – request the service from the service locator using the Resolve method (this requires you derive from the JulMar.Windows.Mvvm.ViewModel base class, or hit the service locator using the static property):
private void OnShowMessage(string message)
{
    var messageVisualizer = Resolve<IMessageVisualizer>();
    if (messageVisualizer != null)
    {
        Result = Enum.GetName(typeof (MessageResult),
            messageVisualizer.Show(Title, message, MessageButtons.YesNoCancel));
    }
}
Notice that I test to ensure the visualizer is available – remember that services can be replaced or removed – I might do this in my unit tests for example (I actually mock the interface rather than replace it, but you get the point – test to make sure it’s there).
We want to see the result, so I take the resulting enum and convert it to a string and assign it to a new Result property on the ViewModel. This, like Title, is just a field-backed string that does a property change notification.
IErrorVisualizer
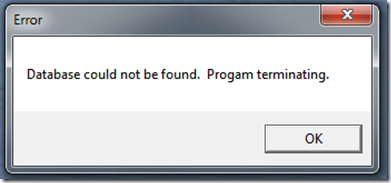
The error visualizer is for cases where you want to display an error dialog to the user with a title and message. The default implementation displays a MessageBox with an OK button

It returns a boolean response indicating that the user clicked the OK button (versus dismissing using the Close “X” button). It has a similar interface to the message visualizer:
private void OnShowError(string errorMessage)
{
    var errorVisualizer = Resolve<IErrorVisualizer>();
    if (errorVisualizer != null)
    {
        Result = errorVisualizer.Show(Title, errorMessage).ToString();
    }
}
We will assign the boolean result to the string Result property as well.
INotificationVisualizer
This visualizer is for cases where you are doing something in the ViewModel logic, on the UI thread that takes a moment to process. Sorting a list, or searching an in-memory list might be an example. True long-running operations should always be on a separate thread and use properties or the message mediator to coordinate with the UI thread. That said, there are times when you want to do the logic inline with the request and you know it’s going to take a second or two to process it. Enter the INotificationVisualizer. It takes the same title and message as it’s cousin visualizers but the default implementation does not use them – instead, the default implementation simply changes the cursor to an hourglass (the defacto standard for “please wait”). This is a service that I often replace with a custom visualzation – a progress bar, thumbar progress on Windows 7, or even a dialog overlay. Invoking it is simple:
private void OnShowNotification(string message)
{
    var notifyVisual = Resolve<INotificationVisualizer>();
    if (notifyVisual != null)
    {
        using (notifyVisual.BeginWait(Title, message))
        {
            // Sleep for 2sec, pretending to work
            Thread.Sleep(2000);
        }
    }
}
The BeginWait() method kicks off the notification visual (hourglass cursor in this case). It returns a disposable object that you invoke Dispose on to return to the normal cursor. Again, let me stress this is not optimal for a true long-running operation – this locks the UI up until the thread returns so only use this for very short operations.
Creating the View
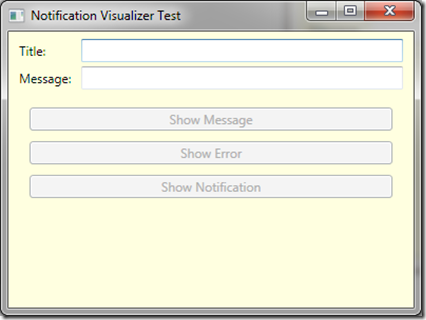
The View for this application will be simple – let’s use an ItemsControl to generate a button for each of the exposed commands, two TextBoxes to hold the Title and Message, and then a TextBlock for the result, here’s what I want it to look like:

I’ll let you go through the XAML – it’s straightforward and should be pretty easy to follow. The only new thing might be that we’ll set focus to the first focusable element using the FirstFocusedElement markup extension:
<Window x:Class="ServicesTest.Views.MainWindow"
    xmlns="http://schemas.microsoft.com/winfx/2006/xaml/presentation"
    xmlns:x="http://schemas.microsoft.com/winfx/2006/xaml"
    xmlns:julmar="http://127.0.0.1:8080/wpfhelpers"
    xmlns:ViewModels="clr-namespace:ServicesTest.ViewModels"
    Title="Notification Visualizer Test" Height="300" Width="400" Background="LightYellow"
    WindowStartupLocation="CenterScreen"
    FocusManager.FocusedElement="{julmar:FirstFocusedElement}"
    DataContext="{julmar:ViewModelCreator {x:Type ViewModels:MainViewModel}}">

 <Grid Margin="5">
     <Grid.RowDefinitions>
         <RowDefinition Height="Auto" />
         <RowDefinition Height="Auto" />
         <RowDefinition Height="Auto" />
         <RowDefinition />
     </Grid.RowDefinitions>

     <Grid.ColumnDefinitions>
         <ColumnDefinition Width="Auto" />
         <ColumnDefinition />
     </Grid.ColumnDefinitions>

     <Label Grid.Column="0" Grid.Row="0" Content="Title:" />
     <TextBox Grid.Column="1" Grid.Row="0" Margin="5,2" Text="{Binding Title}" />
     <Label Grid.Column="0" Grid.Row="1" Content="Message:" />
     <TextBox x:Name="tbMessage" Grid.Column="1" Grid.Row="1" Margin="5,2" />

    <ItemsControl Grid.Row="2" Grid.ColumnSpan="2" Margin="10"
                  ItemsSource="{Binding VisualizationCommands}">
        <ItemsControl.ItemTemplate>
            <DataTemplate>
                <Button Margin="5" Content="{Binding Title}" Command="{Binding Command}"
                        CommandParameter="{Binding ElementName=tbMessage, Path=Text}" />
            </DataTemplate>
        </ItemsControl.ItemTemplate>
    </ItemsControl>

    <TextBlock FontSize="24pt" Grid.ColumnSpan="2" Grid.Row="3"
            HorizontalAlignment="Center" VerticalAlignment="Center"
            Text="{Binding Result, FallbackValue=None}" />
    </Grid>
</Window>
That should do it – if you’d like to just download the project and play with it, it’s available here: VisualizerTest.zip. In the next post we’ll take a look at the grand-daddy of the message visualizers in the MVVM Helper toolkit: the IUIVisualizer!